FREE SHIPPING TO THE UNITED STATES
Email: customerservice@skinomi.com

Home // Carbon Fiber, Wood & Metal Series Skin Installation & Removal Instructions
Carbon Fiber, Wood & Metal Series Skin Installation & Removal Instructions
| Skinomi DesignSkin™ Installation Carbon Fiber, Natural Wood & Brushed Metal 1. PREPARATION
2. INSTALLATION
(For Clear TechSkin™ Only)
|
|
Skinomi Screen Protector & Skin Removal
|
|

1. Is the application solution harmful to my device?
Small amounts are not harmful, but try to avoid getting the solution into speakers, mic, usb, or sim ports. Turn off the device and remove battery if possible.
2. My screen protector looks hazy, is it ruined?
Allow 24-48 hours for the solution to evaporate and the film to set. The protector will be 100% clear.
3. My screen protector has bubbles. I have had it on for 24 hours. Is there anything I can do?
Most bubbles will clear as the liquid evaporates, larger bubbles may take longer and some may not clear. Allow a few days for bubbles to clear, if they don’t, Skinomi does offer a lifetime replacement guarantee.
4. Will this screen/skin protector be compatible with my case?
Case manufacturers have differing tolerances for fitment. Some will work while others may damage the film. Generally looser fitting cases like those made of silicone, rubber, and leather will work, while tighter fitting plastic cases may not. Although not recommended, sometimes omitting the Skinomi side pieces of a full body protector may allow the case to fit.
5. My screen/skin protector will not adhere, what can I do?
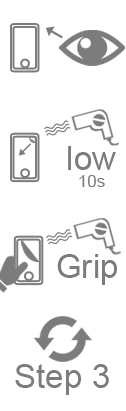
This is usually caused by having excess liquid under the protector, attempt to squeegee out as much liquid and allow the film to dry for 15 minutes before returning to your installation. Alternately, you can speed up the drying process by using a blow dryer in “low” setting.
6. I do not like the way the screen protector looks right now, can I remove it and try again?
If it was just applied, you can carefully remove it and re-install the protector. Take care not to touch the adhesive side with dry fingers. Also, due to the properties of the film, the protector may stretch. Leave the film to revert to its original size before reinstalling.
7. My screen protector is too large or too small.
Do not squeegee with excessive force as the film will stretch. Check to make sure the protector you purchased is for your specific model. If it is, contact customer support.
8. My screen protector has a scratch, will that go away?
Small scratches will gradually heal themselves over time.
9. The application solution bottle is empty, what can I do?
The solution is made of a very small amount of detergent and water. Its purpose is to help the film move during installation, making it much easier to adjust the film. Please visit the manufacturers website to learn how to make the solution.
10. Is the application solution required in order to apply this screen protector?
Yes, it is required. It allows the film to be adjusted during installation and allows it to be 100% transparent, after the film sets.
11. I applied my screen protector and it is now peeling, can I re use this one?
No. Contact customer support for your lifetime replacement warranty. Peeling is generally caused by installing the protector too close to the edges of your device.
12. Will the screen protector affect my device’s screen sensitivity?
No. The screen protector will not affect sensitivity.
13. I cannot figure out where the small pieces of the skin protector lay on my device, is there an installation video for this?
Start with the largest pieces first then work your way down to the smallest pieces. Panels are grouped together for ease of installation.
14. Do I spray the screen protector and my device?
Never spray the device directly.
15. The squeegee is missing, can I use an alternative?
Skinomi no longer provides a squeegee. However you can use any plastic card such as a debit card, membership card, etc. wrapped with the included microfiber cloth to soak up excess solution.
16. Will the screen protector be difficult to swipe with?
There will be some added friction immediately after installation but this will disappear within a few days.
WARNING: As with any electronic device, exposing the device to excessive water, fluids or liquids may cause harm to the device. Skinomi™ will not be responsible for damages caused by excessive use of water or other liquid solutions during installation. Furthermore, Skinomi will not be responsible for damages that that may occur from improper installation or removal of TechSkin, DryTech, Design Skin or any products offered by Skinomi or its affiliates.
*Questions or Concerns? Let us know at customerservice@skinomi.com. We’re here to help!


 |
 |
 |
 |